...

| Page Tree Search | ||
|---|---|---|
|
| Table of Contents |
|---|
What is MorphoBank?
Scientists around the world, including taxonomic experts studying everything from insects to viruses and dinosaurs to plants, work every day to add to our knowledge of biodiversity through scholarly research released in peer-reviewed publications. MorphoBank, developed and supported by funding from the U.S. National Science Foundation as well as institutional members, is a digital archive of those data, facilitating open sharing of observations published by today's scientists.
Specifically, MorphoBank assists scientists building the Tree of Life - the genealogy of all living and extinct species. In this endeavor scientists must collect data on all heritable features - both genotypes (e.g., DNA sequences) and phenotypes (e.g., anatomy, behavior, physiology). MorphoBank is part of the new and growing cyberinfrastructure for phenotypes to house, save and share information on anatomy, physiology, behavior and other features of species. The genomic part of this work is archived at the National Center for Biotechnology Information.
...
MorphoBank is a web application providing an online database and workspace for evolutionary research, specifically systematics (the science of determining the evolutionary relationships among species). One can think of MorphoBank as two databases in one: one that permits researchers to upload images and affiliate data with those images (e.g., species names, anatomical descriptions) and a second database that allows researchers to upload morphological (phenomic) data and affiliate it with what are called 'phylogenetic matrices'. Phylogenetic matrices are spreadsheets that have species in rows and obserations about those species in columns. In both cases, MorphoBank is project-based, meaning a team of researchers can create a MorphoBank project within which they initially share images, matrices and associated data exclusively with each other. When a paper associated with the project is published, the research team can make their data permanently available for public view on MorphoBank where it is now archived.
...
1) Too much information was being lost when morphologists produced an article with a new phylogenetic tree. No archive existed for morphologists to store the images and matrices that backed up their cell scores. Images and matrices need to be readily available in both human- and computer-readable formats for the science of morphological systematics to be repeatable. Publishing a matrix on MorphoBank in conjunction with a peer-reviewed article, now considered a best practice, guarantees that the anatomical descriptions of a character and its character states are easily accessible for other researchers to repeat and build on results.
2) Seeing images that document the basis for homology in a character state or a cell score is enormously helpful to researchers during their research project. This is particularly important if their matrices are large (hundreds of taxa and thousands of characters). Before MorphoBank, a researcher would have had to trust her memory as she made comparisons among hundreds of species. It seemed much more scientific to store an image of a character to refer to repeatedly while adding new data.
...
MorphoBank does not own the cooyright of the media it hosts. Media (e.g., 2D and 3D images, video) are placed on MorphoBank by content providers from the scientific community at large. These content providers also upload information on the copyright status of media and the restrictions governing the reuse of media. MorphoBank encourages open sharing of media but leaves the decision to content providers as to which Creative Commons license suits their research needs.MorphoBank encourages content providers to choose CC0 or CC-BY reuse policies because they (and only they ) are Open Data licenses. Please be aware that choosing an NC (non-commercial usage only) license may prevent your data submission from being used on open-content only websites such as Wikipedia. If you wish to reuse any media on MorphoBank you must also check the restrictions governing the media's reuse and adhere to those restrictions.
...
When you use MorphoBank please cite the software:
O'Leary, M. A., and S. G. Kaufman. 2012. MorphoBank 3.0: Web application for morphological phylogenetics and taxonomy. http://www.morphobank.org.
You may also be interested in citing the conceptual paper describing the the database and tool:
O'Leary, M. A., and S. Kaufman. 2011. MorphoBank: phylophenomics in the 'cloud'. Cladistics. 27:1-9.
Each MorphoBank project is issued a unique identifier beginning with the letter 'P' for project. You will see this identifier displayed in many places throughout MorphoBank while editing your project. For example, your project number appears next to your project title in the My Projects project list and on the project overview page. Once your project is published you may link to your project with a URL in the format
http://morphobank.org/permalink/?P44where 'P44' is replaced with your project identifer. Yes, the question mark should precede your number in your permalink, so it would look like this for another project: http://morphobank.org/permalink/?P660. For unpublished projects, the only way to access data is by logging into MorphoBank projects to which you belong.
Folios are published when the project is published, unless the folio's status dropdown is set to 'never publish to project', and may be linked to using a URL in the format:
http://morphobank.org/permalink/?F20where 'F20' is your folio identifier. Folio identifiers always begin with the letter 'F' and appear next to the folio name in the project folios tab. Your project must be published for folios to be accessible to the public.
...
MorphoBank is a collaboration among many scientists who are using phenotypes to build phylogenetic trees (phylophenomics) or who are documenting phenotypes for other aspects of biological and paleontological research. The project was developed at Stony Brook University between 1990-2021, after which it moved to the nonprofit scientific database hub Phoenix Bioinformatics. MorphoBank was supported by funding from the National Science Foundation to Stony Brook University and to Phoenix Bioinformatics. You can read more about the team here.
...
Yes. However, students must also register their advisor as a MorphoBank project member member of all of their MorphoBank projects in order to participate.
How do I change my password?
...
What kind of data do I need to start my project?
MorphoBank supports two broad types of projects: those with matrices and images and those with images and associated metadata. You can start either project by simply Common ways to start a project are with a phylogenetic matrix or a set of images or both. You can also start a matrix de novo in MorphoBank and collect your data there or load a matrix that you want to expand or edit. You can start a project by simply uploading images, matrices or metadata. We recommend that a user upload all the taxonomic names, specimens and views affiliated with a given project as a good starting point. This makes the workflow easier.
For matrix-based projects , however, uploading an existing matrix as a Nexus or TNT format file will also upload all taxonomic names (as well as characters). A user then only has to add specimen names for media.
What kind of computer setup do I need to use MorphoBank?
MorphoBank should work with any recent web browser, including Internet Explorer versions 8 and 9, FireFox versions 5.0 or better and Safari 5.0 or better on all supported operating systems (Windows, Mac OS X and Linux/Unix). For optimal performance of MorphoBank please use one of these three browsers: Internet Explorer, Firefox or Safari (and please make sure you keep them up to date!) Certain MorphoBank features require the Adobe Flash version 10 (or better) browser plug-in.
Do you have any suggestions for using MorphoBank most efficiently?
Yes. There are To use MorphoBank you must be online and the site is accessible using any commonly used web browser.
Do you have any suggestions for using MorphoBank most efficiently?
Yes. There are sequences to entering data that may save time. For example, images need to have an identity - they should be affiliated with a specimen that is in a repository and which has a (or marked as having an "unvouchered" status) and the repository number and a taxon taxonomic name should be supplied. Entering that information about the specimen first is useful because often a researcher wants to enter multiple images of the same specimen.
If you are not entering a matrix at the start: it is a good idea to enter the names of taxa and specimens when you begin your project before you enter images. Even if you occasionally need to go back and enter a new specimen number or a new taxon name, work flows faster if you first enter as much of this information as possible. Then you can use the batch media upload feature (see "Adding many images at once") to add many images at once. These images then exist in your workspace and can be affiliated with the taxon and specimen information that you have entered into the database.
If you are entering a matrix at the start: and plan to add media (images) to affiliate with characters cells in the matrix, it is a good idea to then the immediately enter specimen numbers at the start that go with the names of media you plan to load for the taxa in your matrix. Then you can use the bulk batch media upload feature (see "Adding many images at once") to add many images at once. These images then exist in your workspace and can be affiliated with the taxon and specimen information that you have entered into the database.
...
Yes, logged in users can request to duplicate an unpublished project they are a member of or any published project. To place the request click the "Request Project Duplication" link on the project overview page of the project you would like to duplicate. Users will be contacted by MorphoBank once the duplication request has been fulfilled. When users edit various parts of the duplicate project the changes do not have any effect on the master project. One can also simply download a matrix from MorphoBank and reload it as a new project.
While MorphoBank aims to meet the needs of all users, storage is finite and some projects with media are quite large. We, therefore, ask that researchers consider best practices prior to submitting a request for duplicationThe default maximum project size for all new projects is 5 GB.
Does MorphoBank support continuous and discrete data for morphological phylogenetics?
Both discrete and continuous characters are supported in MorphoBank. Discrete characters describe a feature as a finite number of analytical states. Examples include "eyes: blue, green or brown" or "wings: present or absent". Continuous characters describe a feature using a decimal quantity or pair of quantities defining a range. Because these quantities are decimals, they can represent any real value and are thus mathematically continuous. (Well, not quite: MorphoBank limits precision to 10 significant digits, but this should be more than enough for most analyses). Examples of continuous character values include "pH: 6.7" or "temperature range: 40.54C - 42.85C".
For discrete characters each state is assigned a number. For example one might implement our previous example as "eyes: state 1 0 (blue), state 2 1 (green), state 3 2 (brown)." These numbers are used when scoring. For continuous characters a single specific quantity or a pair of quantities defining a range must be specified. The units for the quantity are specified in the character description. Each score is simply a decimal value, or pair of values defining the minimum and maximum of a range.
Both discrete and continuous characters and scores may be output in the three file formats Morphobank supports: Nexus, TNT and Micropie.
Currently MorphoBank supports continuous data in TNT format only. Users may place continuous characters throughout their matrix in MorphoBank but when the file is downloaded, all the continuous characters will be organized into a single TNT block.
...
MorphoBank accepts a variety of image formats including JPEG, GIF, PNG, TIFF and Photoshop. Note that Photoshop files that use layer effects may not render properly on MorphoBank. For consistent results we recommend converting these files to TIFF format before uploading. All image files should be in RGB mode. Files in CMYK mode may not render properly. You should upload image files at the highest resolution that makes sense for your project. MorphoBank will automatically create sized versions for use on the site as well as a full-resolution version optimized for online viewing. The original uploaded file will be retained and can be made available for download.
MorphoBank also accepts the following video file formats: MPEG-4, QuickTime and WindowsMedia. The preferred video file format for upload to MorphoBank is MPEG-4. Files in QuickTime and WindowsMedia format will usually work so long as the compression method used is supported by MorphoBank's video processor. In general, videos compressed with WindowsMedia will work, as will most QuickTime compression methods (some very old and rarely used methods like GIF compression are the notable exceptions). AVI files usually will not work and should be converted to MPEG-4 prior to upload. In general if your uploaded file is being rejected by MorphoBank it is recommended that you try re-encoding the file in MPEG-4 format using one of the many video conversion tools available for Mac OS X, Windows and Linux. Audio files may be uploaded to MorphoBank in MP3, AAC, AIFF or WAV format. Other formats are not supported. If you need to convert or edit your audio files use a sound editing application such as Audacity (http://audacity.sourceforge.net/). MorphoBank does not support the PowerPoint file format. If you need to upload images from a PowerPoint presentation, you should export them from PowerPoint in a supported format such as JPEG and then upload those files.You can upload your files in PLY, STL, ZIP, TIFF and DCM, file formats, as well as any acceptable video format if you are adding CT data to your project.
...
There is an "Add media batch" button at the top of your project's media list. Following this link takes you to a form where you can upload an archived file of media and enter metadata that apply to all media in the batch. This will allow you not only to batch upload, but also to batch catalog a group of media. To prepare your media files (images, video, sound, etc.) for upload, you must convert the batch of files to a single archive file. MorphoBank will accept archives in either Zip or Tar format. Tar archives may be optionally compressed with Gzip or BZip2. To create Zip archives on Windows, you must use a program like WinZip. On Mac OS X, simply control-click on the folder containing the images and select "Create archive" from the pop-up menu.
Your archive must contain files in MorphoBank's accepted media formats. (For detailed information on what media file formats are accepted see the next FAQ item, listed on this page under 'What media file formats are accepted?'). ) Other formats will be ignored. You may group files in nested folders - they need not be in a single folder.
Your archive must be no greater than 2000MB 2000 MB in size. Archives exceeding this size will not process (please just break them down).
What are Folios?
Folios are groupings of selected project media. First create a new FoilioFolio, then you may select specific media to add to your folios by clicking the "Edit folio media" link in your list of folios or by using the "Folio options" tool on the Media page. This tool allows you to add multiple media to a folio directly from media search results. Once you have added items to your folio you can return to the folios tab to change the order of the media and preview the resulting folio.
Folios are published when the project is published, unless the folio's status dropdown is set to "never publish to project", and may be linked to using a URL in the format:
http://morphobank.org/permalink/?F20where 'F20' is your folio identifier (and yes, the “'?†' is always a part of the permalink). Folio identifiers always begin with the letter 'F' and appear next to the folio name in the project folios tab. Your project must be published for folios to be accessible to the public.
Using the project Folios tab, you can create as many named folios as you need.
...
You may upload a CT stack, comprised of hundreds or thousands of individual images, to MorphoBank as a single ZIP-format archive. Your ZIP file should include only images with no extraneous files or sub-directories. All images in the stack should be TIFF or DICOM format and must be numbered sequentially. Any file with a missing number will be skipped during upload, resulting in an error or inaccurate 3D image. Please remember that ZIP-format stack uploads should be used for CT data only and not as a batch upload method for individual specimen images.
You may also upload media derived from CT data to MorphoBank, including 3D surfaces in PLY and STL format and pre-rendered 3D animations in QuickTime, MPEG-4, OBJ and WindowsMedia formats.
To upload a CT scan or derived media, go to the Media tab of your project. Click on the button titled "Add new 2D/ 3D media file"Media". More details here.
When a PLY or STL 3D surface is uploaded, the icon below will be shown in place of a thumbnail wherever the file appears in your project. Please note color manipulations made to files may not be supported.
...
MorphoBank, with support from the National Science Foundation, is designed to be a public and permanent archive of scientific data supporting peer-reviewed scientific publications. You may leave your unpublished working data behind password-protection on MorphoBank while you prepare and submit your research (updated August, 2016).. All data on MorphoBank should eventually be released, MorphoBank is not designed to house unpublished data long term.
Can I allow an anonymous reviewer to access my matrix during review at a journal?
Yes. Many journals like to provide reviewers access to matrix data so they that reviewers can check authorsan author's results as part of a review. Project Administrators can enable an anonymous reviewer login for their project in the Project Info form accessed through the "Edit project info" link on the Project Overview page. Once enabled, reviewers can login log in by entering the project number in the email address field and the reviewer login password entered by the Project Administrator in the Project Info form.
...
What information must I provide for a specimen?
At You must specify whether a specimen is vouchered or unvouchered. If it is vouchered, at an absolute minimum you must provide the institution code and catalog number for the specimen. Both of these values should conform to the standards of the institution from which the specimen originates. If you are not sure of the formats for these values, contact the institution's collections manager. Typically, the institution code will be a 2-4 letter abbreviation of the institutional name (ex. AMNH = American Museum of Natural History, YPM = Yale Peabody Museum).Whenever possible a collection code should be provided. As with the institutional code and catalog number, this should conform to institutional standards. Many, but not all, institutions use collection codes.
A taxonomic identification of the specimen should be provided for all specimens and is used by the matrix editor to retrieve relevant media, and by the media search/filtering system.
Matrix Editing
How can I control access to rows in a matrix?
To control access to specific rows (taxa) in a matrix double click on the taxon name in the matrix editor (you must be the Project Administrator of your project to do this). You will see a window like this:
By default any row may be edited by any project member. If you wish to restrict access to the row to a single project member, select the user's name in the "user" drop-down menu.
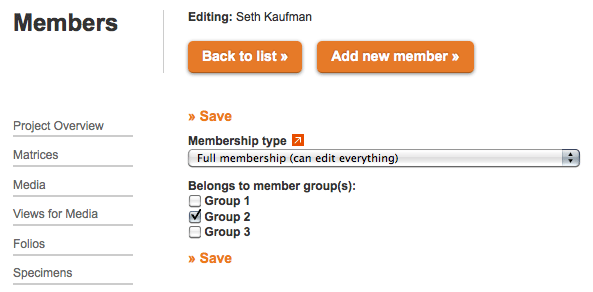
If you wish to restrict access to a selected group of project members, then you must first set up a Member Group containing the selected users. Project Administrators can create Member Groups by following the "Edit Member Groups" link in the right column of the project overview page. Then you can select the Member Group using the "Member Group" drop-down menu in the screen above.
Once the Project Administrator has created the new Member Group, they can add project members to the group by following the "Manage members" link on the project overview page. Edit each member you wish to add to the group. In the member information form, there are checkboxes for each member group defined for your project. Check the boxes for the groups the member should belong to and save the record.

How do I add and/or reorder taxa in my matrix?
Click on the taxon list button:
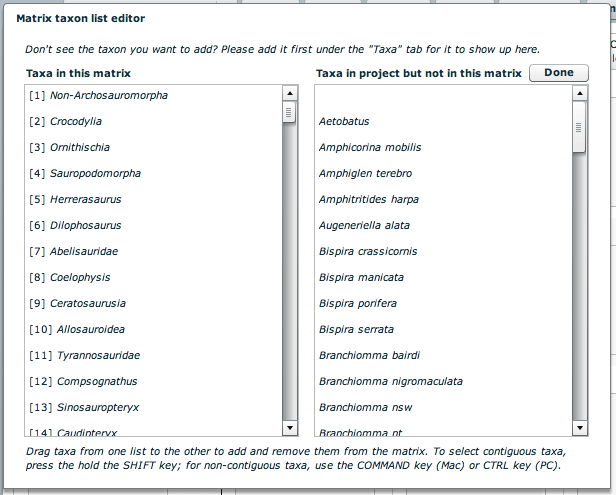
You will see a window like this:
To add a taxon to your matrix simply drag the names from the list on the right (names in your project that are not in the matrix) to the list of the left (names that are in the matrix). To remove a taxon from your matrix drag it from the list on the left to the one on the right. NOTE: Once you remove a taxon all scoring and associated cell media are permanently removed!
To reorder taxa in your matrix simply drag-and-drop the taxa within the left-hand list.
Note that only taxonomic names that are part of your project are shown in the list. If you need to add a new name it must be done through the "taxa" tab in your project.

How do I know if I can edit a row in the matrix or not?
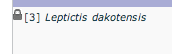
If you do not have access to a row a lock icon will appear next to the taxonomic name. Names with no lock are editable.
Treatment of Multistate Taxa in Matrices
MorphoBank recognizes that Nexus format allows the user to distinguish between polymorphisms and ambiguities for multistate taxa.
Under the Preferences in the Matrix Editor, the user can select whether to treat multistate taxa as "polymorphic" or "uncertain". The default condition is "polymorphic". This choice applies matrix-wide but can be modified on a per-cell basis using the cell editor. Changing a selection in the cell editor affects only that cell.
The multistate taxa tool will be grayed out (disabled) if only one state has been scored for a given cell.
For display purposes on screen in the MorphoBank matrix editor, multistate taxa that are scored as polymorphic by the user appear as separated by a comma, like this "0, 2". Multistate taxa that are scored as uncertain by the user appear as separated by a slash, like this "0/2" or this "1, 4, 6"
The underlying Nexus file that MorphoBank produces will download such that a cell containing multistate taxa that are polymorphic will be represented as "{0, 2}" in the Nexus file, and multistate taxa that are uncertain will be represented as "(0, 1)".
If a pre-existing Nexus file contains the distinction of polymorphic vs. uncertain multistate taxa and is loaded to MorphoBank, the distinction will be preserved and will display as such. Any new changes to the matrix that the user enters will be preserved in future downloads.
Labels
How do the image labeling features work?
How to use the image viewer
Use the mouse to click and drag across the image. You can use the mousewheel or trackpad to zoom in or out of the image. The + and - buttons and zoom slider bar at the top of viewer may also be used. The viewer displays the image at full resolution, loading detail as you zoom. The more you zoom the more detail will be visible.
You may annotate the image with text notes. Each annotation is associated with a point or rectangular area of the image. To create an annotation, select the line (point) or rectangle tool from the tool bar, then click on the location you wish to annotate. For point annotations a line will appear connecting the location with a text box. You may drag both the point of the line and the text box to adjust position. Click on the text box to add text. For rectangular annotations a rectangle will appear. Drag on the edges at the highlighted locations to resize the rectangle. Drag the rectangle on its interior to reposition it. You may also drag the text box into position. Click on the text box to add text. All changes to annotations are saved automatically as you work.
Toolbar guide

...
When this tool is selected clicking and dragging on the image will pan across it.
![]()
When this tool is selected clicking on the image will add rectangular labeled regions at a location. You can resize the region by clicking and dragging on the drag points. Click and drag on the center of the region to relocate the region.
![]()

When this tool is selected clicking on the image will add labels to associated with point locations. The area around the point location will be highlighted with a light transparent red circle. Click and drag within the circle to move the label.
![]()
You can see an overview of the entire image, with the currently visible area highlighted by clicking on this tool. Clicking on a point in the overview will pan the magnified image to that location.
![]()
You can use this button to prevent accidental movement or deletion of labels while navigating the image. When locked it will not be possible to move, editing, create or delete labels on the image. You can still use the zoom and pan tools when the labels are locked.
![]()
You can zoom out to fit the entire image, centered, in the viewer window by clicking on this tool.
Keyboard shortcuts
Single-key shortcuts are available for common actions. Pressing the key is equivalent to the corresponding mouse action.
space to activate image panningrto select the rectangle label toolpto activate the point label toolnto toggle visibility of the image overviewhto return the image to the centered, zoomed out 'home' positioncto toggle visibility of viewer controlsTABto hide controls and labels+or]to zoom in in small increments-or[to zoom out in small increments⬆️,⬇️, ⬅️ or ➡️ to pan the image in small incrementsdto delete the selected annotationlto lock and unlock annotations
Publishing Your Data
What is the web address or permalink I can give others to access my project data?
Each MorphoBank project is issued a unique identifier beginning with the letter 'P' for project. You will see this identifier displayed in many places throughout MorphoBank while editing your project. For example, your project number appears next to your project title in the My Projects project list and on the project overview page. Once your project is published you may link to your project with a URL in the formathttp://morphobank.org/permalink/?P44where 'P44' is replaced with your project identifer. Yes, the question mark should precede your number in your permalink, so it would look like this for another project: http://morphobank.org/permalink/?P660. For unpublished projects, the only way to access data is by logging into MorphoBank projects to which you belong.
In what ways can people access my published data?
Once published, your project will be included in the Browse Projects section of morphobank.org. Following the "View project" link will take site users to your project overview page which can include an abstract, citation, exemplar media, links to the published article, and other relevant information. There is also side navigation linking to your project's published matrices, media, views for media, specimens, taxa, folios, bibliography and documents. The data in these sections are presented similarly to the MorphoBank editing interface, but without editing capabilities.Your project's data will also be included in the results of searches on the MorphoBank.org site.
Security
How can I be sure my data is secure?
Another advantage of a web-based system like MorphoBank is that time-consuming maintenance tasks such as data backup can be centralized. MorphoBank runs on servers hosted by the State University of New York at Stony Brook. All data on the main MorphoBank server at Stony Brook is backed up to tape, as well as to off-site mirror servers at the American Museum of Natural History.Stony Brook servers are backed up nightly and serviced by a professional full-time staff of system administrators. Currently the Stony Brook backup system is scheduled to run nightly incremental backups.
If disaster should strike we should be able to recover virtually all lost data. For data recovery, the Morphobank system administrator will work with the Stony Brook system administrators to get the data loaded back in to the MorphoBank Portal.
For optimal security we suggest you perform your own periodic back-ups using the project "download" feature. This can be found on the right side of the project overview page (the summary page displayed when you first select a project) and will provide you with a Zip-format archive containing all matrices and media from your project.
Note that a project download is not a full backup in that it can not be reloaded into MorphoBank to reconstitute a project. The download consists of separate NEXUS files and images. Media, characters, taxa and scoring are all retained, but labels and links between matrix characters and cells to media will not be retained due to limitations in the NEXUS file format. Thus we do not recommend deleting your work within MorphoBank unless you are absolutely sure you no longer need your projectWhenever possible a collection code should be provided.A taxonomic identification of the specimen should be provided for all specimens and is used by the matrix editor to retrieve relevant media, and by the media search/filtering system.
Matrix Editing
How can I control access to rows in a matrix?
To control access to specific rows (taxa) in a matrix double click on the taxon name in the matrix editor (you must be the Project Administrator of your project to do this). You will see a window like this:
By default any row may be edited by any project member. If you wish to restrict access to the row to a single project member, select the user's name in the "user" drop-down menu.
If you wish to restrict access to a selected group of project members, then you must first set up a Member Group containing the selected users. Project Administrators can create Member Groups by following the "Edit Member Groups" link in the right column of the project overview page. Then you can select the Member Group using the "Member Group" drop-down menu in the screen above.
Once the Project Administrator has created the new Member Group, they can add project members to the group by following the "Manage members" link on the project overview page. Edit each member you wish to add to the group. In the member information form, there are checkboxes for each member group defined for your project. Check the boxes for the groups the member should belong to and save the record.
How do I add and/or reorder taxa in my matrix?
Click on the taxon list button:
You will see a window like this:
To add a taxon to your matrix simply drag the names from the list on the right (names in your project that are not in the matrix) to the list of the left (names that are in the matrix). To remove a taxon from your matrix drag it from the list on the left to the one on the right. NOTE: Once you remove a taxon all scoring and associated cell media are permanently removed!
To reorder taxa in your matrix simply drag-and-drop the taxa within the left-hand list.
Note that only taxonomic names that are part of your project are shown in the list. If you need to add a new name it must be done through the "taxa" tab in your project.
How do I know if I can edit a row in the matrix or not?
If you do not have access to a row a lock icon will appear next to the taxonomic name. Names with no lock are editable.
Treatment of Multistate Taxa in Matrices
MorphoBank recognizes that Nexus and TNT formats allow the user to distinguish between polymorphisms and uncertainty for multistate taxa.
Under the Preferences in the Matrix Editor, the user can select whether to treat multistate taxa as "polymorphic" or "uncertain". The default condition is "polymorphic". This choice applies matrix-wide but can be modified on a per-cell basis using the cell editor. Changing a selection in the cell editor affects only that cell.
The multistate taxa tool will be grayed out (disabled) if only one state has been scored for a given cell.
For display purposes on screen in the MorphoBank matrix editor, multistate taxa that are scored as polymorphic by the user appear as separated by a comma, like this "0, 2". Multistate taxa that are scored as uncertain by the user appear as separated by a slash, like this "0/2" or this "1, 4, 6"
The underlying Nexus or TNT file that MorphoBank produces will download such that a cell containing multistate taxa that are polymorphic will be represented as "{0, 2}" in the Nexus or TNT file, and multistate taxa that are uncertain will be represented as "(0, 1)".
If a pre-existing Nexus or TNT file contains the distinction of polymorphic vs. uncertain multistate taxa and is loaded to MorphoBank, the distinction will be preserved and will display as such. Any new changes to the matrix that the user enters will be preserved in future downloads.
Labels
How does the image labeling features work?
How to use the image viewer
Use the mouse to click and drag across the image. You can use the mousewheel or trackpad to zoom in or out of the image. The
+and-buttons and zoom slider bar at the top of viewer may also be used. The viewer displays the image at full resolution, loading detail as you zoom. The more you zoom the more detail will be visible.You may annotate the image with text notes. Each annotation is associated with a point or rectangular area of the image. To create an annotation, select the line (point) or rectangle tool from the tool bar, then click on the location you wish to annotate. For point annotations a line will appear connecting the location with a text box. You may drag both the point of the line and the text box to adjust position. Click on the text box to add text. For rectangular annotations a rectangle will appear. Drag on the edges at the highlighted locations to resize the rectangle. Drag the rectangle on its interior to reposition it. You may also drag the text box into position. Click on the text box to add text. All changes to annotations are saved automatically as you work.
Toolbar guide
When this tool is selected clicking and dragging on the image will pan across it.
When this tool (or the six-sided polygon) is selected, clicking on the image will add rectangular labeled regions at a location. You can resize the region by clicking and dragging on the drag points. Click and drag on the center of the region to relocate the region.
When this tool is selected clicking on the image will add labels to associated with point locations. The area around the point location will be highlighted with a light transparent red circle. Click and drag within the circle to move the label.
You can see an overview of the entire image, with the currently visible area highlighted by clicking on this tool. Clicking on a point in the overview will pan the magnified image to that location.
You can use this button to prevent accidental movement or deletion of labels while navigating the image. When locked it will not be possible to move, editing, create or delete labels on the image. You can still use the zoom and pan tools when the labels are locked.
You can zoom out to fit the entire image, centered, in the viewer window by clicking on this tool.
Keyboard shortcuts
Single-key shortcuts are available for common actions. Pressing the key is equivalent to the corresponding mouse action.
space to activate image panningrto select the rectangle label toolpto activate the point label toolnto toggle visibility of the image overviewhto return the image to the centered, zoomed out 'home' positioncto toggle visibility of viewer controlsTABto hide controls and labels+or]to zoom in in small increments-or[to zoom out in small increments⬆️,⬇️, ⬅️ or ➡️ to pan the image in small incrementsdto delete the selected annotationlto lock and unlock annotations
Publishing Your Data
What is the web address or permalink I can give others to access my project data?
Each MorphoBank project is issued a unique identifier beginning with the letter 'P' for project. You will see this identifier displayed in many places throughout MorphoBank while editing your project. For example, your project number appears next to your project title in the My Projects project list and on the project overview page. Once your project is published you may link to your project with a URL in the formathttp://morphobank.org/permalink/?P44where 'P44' is replaced with your project identifier. Yes, the question mark should precede your number in your permalink, so it would look like this for another project: http://morphobank.org/permalink/?P660. For unpublished projects, the only way to access data is by logging into MorphoBank projects to which you belong.
In what ways can people access my published data?
Once published, your project will be included in the Browse Projects section of morphobank.org. Following the "View project" link will take site users to your project overview page which can include an abstract, citation, exemplar media, links to the published article, and other relevant information. There is also side navigation linking to your project's published matrices, media, views for media, specimens, taxa, folios, bibliography and documents. The data in these sections are presented similarly to the MorphoBank editing interface, but without editing capabilities.Your project's data will also be included in the results of searches on the MorphoBank.org site.
Security
How can I be sure my data is secure?
An advantage of a web-based system like MorphoBank is that time-consuming maintenance tasks such as data backup can be centralized. MorphoBank backs up both the database and the media files for the resource once a week.For optimal security we suggest you perform your own periodic back-ups using the project "download" feature. This can be found on the right side of the project overview page (the summary page displayed when you first select a project) and will provide you with a Zip-format archive containing all matrices and media from your project.
Note that a project download is not a full backup in that it can not be reloaded into MorphoBank to reconstitute a project. The download consists of separate NEXUS files and images. Media, characters, taxa and scoring are all retained, but labels and links between matrix characters and cells to media will not be retained due to limitations in the NEXUS file format. Thus we do not recommend deleting your work within MorphoBank unless you are absolutely sure you no longer need your project.
Learning about morphological phylogenetics
How can I learn more about researching the Tree of Life with morphology?
Information on topic is taught in many undergraduate and graduate biology courses and is also discussed in natural history museum exhibitions. There is an extensive academic literature on morphological systematics in journals such as Systematic Biology and Cladistics, as well as in many other journals dedicated specifically to certain species. Many books are available on this topic including:
Brower, Andrew VZ, and Randall T. Schuh. Biological systematics: principles and applications. Cornell University Press, 2021.
Wiley, E. O. et al. 1991. The Compleat Cladist.
The University of California Museum of Paleontology at Berkeley has a short introduction here.
...